Covering The Fuselage
AFS Method
The following is an AFS CecoBond Cement covering job of the fuselage. We will also present a Poly Fiber method covering job in another web page. Please remember, there are usually several ways to complete any job. The following information is just one of these examples.
We have added photos from another build showing a couple of missing areas in the beginning of this stage of covering. However, the covering process photos will be exclusively from our builder using the AFS gluing system.
NOTE: Aircraft Finishing Systems (AFS) is no longer in business. However, the production rights to the former AFS of Montana has been assumed by Stewart Systems of Washington.
Prior to taping, it is recommended to first use either a plastic mallet or square head "shop hammer" type to tap down any sharp aluminum edges as close to the aluminum tubing as possible. This should be done on "ALL" fuselage side ribs and sheet aluminum edges throughout the fuselage. This will help in the long-term by reducing the chances of the aluminum edges from cutting or wearing through the covering or skin of the plane after the plane is flying. |
When getting ready to apply your glue, it is best to use an inexpensive masking tape to create a "straight" glue edge along the surface of the tubing. This will not be needed where you will be gluing and wrapping the fabric "around" the inside of the tubing surface. This will improve the final look of all glues seams. |
Before applying the glue edge tape, be sure to completely clean all aluminum parts and tubing to be glued with MEK. See MEK Warning Information before using. |
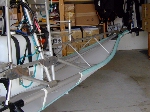
Our builder used the method of covering the fuselage while sitting on its wheels. This is not the easiest way to cover the fuselage, but it works. |
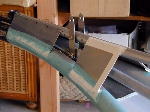
The cemented area should show an even color indicating a complete bond between the fabric and the metal. Drying time can be up to four hours depending on the temperature and the humidity. Now, repeat this process for securing the fabric to the nose cone by at least 2 inches. |
 |
 |
 |
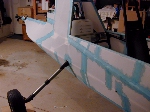
For the first side, you will need to apply the glue edge masking tape to the aluminum tubing just above the fabric contact point and around the tubing. However, applying the glue to the bottom fabric edge will be a little different. Apply your glue edge masking tape about 1-1/2 inches from the bottom aluminum framework onto the bottom fabric as you will be gluing the side fabric directly to the bottom fabric. Use a small paint brush to apply your glue. Again, you will need to apply a single coat of the glue between the masking tape glue line and the bottom frame cage. Let the cement tack up for about 5 minutes before you apply the fabric to that cemented area. Now, remove the masking tape by folding the tape back onto itself and slowly pull the tape off.
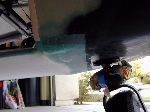
Before securing the fabric to the fuselage with tape, you will first need to remove the main gear leg on the side you will be covering as you will need to cut the gear leg weldment hole in the fabric. Remember, the weldment is at an angle downward, so you will have to compensate for this when measuring off for the weldment hole in the fabric. If you get the hole too low, you may not have enough fabric to reach the bottom cage work for gluing. |
| As the weldment hole is a non-movable area, tack the material down to the bottom first, closest to the weldment hole. This will allow you to even out the fabric over the frame and tack the fabric along the critical areas and bends. Be careful as this can get a bit tricky. |
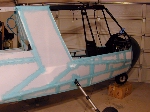
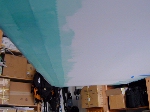
| As you work towards the rear of the fuselage, first tack the material on the bottom of the engine firewall area, then the bottom edge by about the same distance as the firewall area. The trickiest area is the down and 45 degree angle behind the engine area to the tail section. This area will take a lot of fitting, trimming and smoothing to get a good fit to tack the fabric to. This now leaves the tail of the fuselage. Work in about 1-1/2 foot sections, tacking to the top aluminum tubing and the bottom longeron. Work your way all the way to the rear of the fuselage's tail. |
This is a good time to finish the final gluing of the fabric. The cemented area should show an even color indicating a complete bond between the fabric and the metal. Drying time can be up to four hours depending on the temperature and the humidity. |
 |
 |
 |
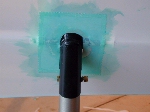 |
In some cases, you may wish to apply a reinforcing patch around the main gear weldment. |
Now, repeat these steps for covering the other side of the fuselage. |
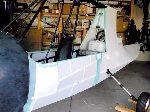 |
After completing the covering of your fuselage, you will now want to do the final ironing to both sides at 350°F and you are done. It's now time to start considering how you plan on painting your covered fuselage, but that will come later in another web page. |