
Get Acrobat Reader
Painting Fuselage, Wings & Tail Sections
Using AFS/Stewart Systems Painting Method
|
For this web page, we will be showing you how to paint your Challenger using the AFS/Stewart Systems method. Above (upper right) is a link to download Adobe's Acrobat Reader if you need it. Also a link to download Stewart Systems Fabric Covering and Painting Manual is included. The manual will go into more detail than what we will present to you in
this article and is recommended that you download a copy before you begin your own painting. |
  |
Adding inspection rings and drain grommets to the wings and fuselage is highly recommended to access hard to get at areas. This will allow internal access to the wings for maintenance and moisture drainage. If you add these items to your Challenger, it is best to do so now, before painting your plane. Once you have determined where you want to place an inspection ring, apply a coat of CecoBond cement to the underside of the inspection ring and firmly seat the ring, bonding it to the fabric. Cut a circle about 2 inches larger then the ring from a scrap piece of covering material. Using CecoBond cement, apply a coat of the cement to the inside area of the ring, on top of the ring, and extending out from the ring by the 2 inches. Place the cloth circle on the wet CecoBond cement and using a 2 inch brush, apply another thin coat of CecoBond cement on top of the cloth circle to tack it down securely. Using a sharp knife, remove the material from the center of the ring. |
 |
 |
 |
 |
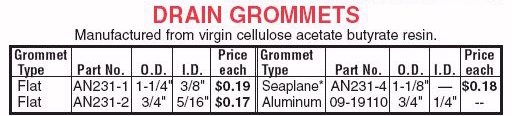
The drain grommet can be a flat "cellulose acetate butyrate resin" washer like drain or the clear seaplane drain grommets shown below. Once you have determined where you want to place a drain grommet, apply a coat of CecoBond cement to the underside of the washer and firmly seat it, bonding it to the fabric. For the washer, the fabric will be applied to the top of the washer in the same manner as the inspection ring. When dried, use a soldering iron to melt a hole through the fabric in the center of the washer. The photos of the seaplane drain grommets (below) are from a Poly Fiber build, but would be installed in the same manner using CecoBond cement. For the seaplane drain grommet, cut a circle from a scrap piece of covering material about the size of a silver dollar. Using CecoBond cement, glue down the cloth patch first as it will be used to reenforce the material when you melt the 1/4 inch hole with your soldering iron. After making the 1/4 inch hole in the center of the patch, apply a coat of the cement to the underside of the seaplane drain grommet and seat the grommet firmly to the center of the patch, over the 1/4 inch hole. Be sure the raised opening of the seaplane grommet is facing the rear of the plane. |
 |
 |
 |
 Available from Aircraft Spruce |
  |
Using the same brush but without adding anymore EkoFill, brush 90° to your first coat to "knock down" the EkoFill and get a smooth surface. Allow to dry a few hours or as recommended on container. This is another good time to use the small iron to knock down any raised areas. You have to move quickly with the iron on EkoFill. Repeat the entire brush process a second time, at 90° to the first, for a total of two brush coats. This completes one brushed "cross-coat". Allow to dry overnight. Using 400 grit "open coat" sand paper, lightly sand the EkoFill. Easy, don't sand through the fabric! Go in between rib stitches. All EkoFill should be a light gray after light sanding. DON'T OVER SAND. The surface should be noticeably smoother. Watch for hidden bracing or wires under surface that may cause you to sand through the fabric. Lead with your opposite hand while you sand to detect any hidden stuff before it's too late. You will need to repeat this process for painting the wings and fuselage. |
 |
 |
A 20 gallon, 115 volt air compressor works great for this purpose. It is highly recommended to add a moisture trap filter in-line with the air hose at the compressor. Set the air hose pressure at around 30/35 psi and your spray gun at 20 psi. Setup your spray gun with well stirred and strained EkoFill. No thinning. (A good quality High Volume, Low Presure (HVLP) Spray Gun with a 1.5mm tip is recommended) |
 |
Adjust the spray from the gun as a mist, making sure you do not have any droplets being applied with the spray. |
 |
Spray 2 cross coats (4 total coats) of EkoFill (approximately 10 minutes between each coat). Let dry overnight. Perform light sanding with 400 grit. Don't over sand! Vacuum and wipe with clean terry cloth. Last chance to gently iron down any problem areas. Be diligent and only use the tip of the iron here. It is possible to mar the EkoFill if you are not careful and it will show on the finish coat. |
 |
Before painting top or final color coat, blow off surface and wipe with clean terry cloth simultaneously. This completes the primer, UV blocking, and filling steps. If desired during the spray process, you can spray an additional 1 or 2 coats of EkoFill to build up the surface to your liking. Two spray cross coats should be plenty. Think light! |
 |
Items Needed:
|
Blow off part and wipe with terry cloth (if not already done). After measuring, stir in catalyst to resin slowly. After stirring for a while notice the Topcoat becoming creamy. Start with 1/2 part water, stir in. Using DuPont M50 viscosity cup, take viscosity measurements. The target is 19-20 seconds. Add small increments of the remaining water until correct time achieved. 19 seconds is desirable. Spray Gun Setup: Open fan control all the way to max. Adjust pressure at gun (in line regulator) to 20psi. Open paint knob approx 3/4 from closed. |
Mask off areas you do not wish to get painted and you are ready to apply the final base coat of paint. The builder selected a final glossy grey finish, which makes it much easier to blend in over the grey UV blocker coat. Be carful not to apply too thick of a coating during each coating or you may wind up with drips and runs in the paint job. Apply an even, light coat per application. |
 |
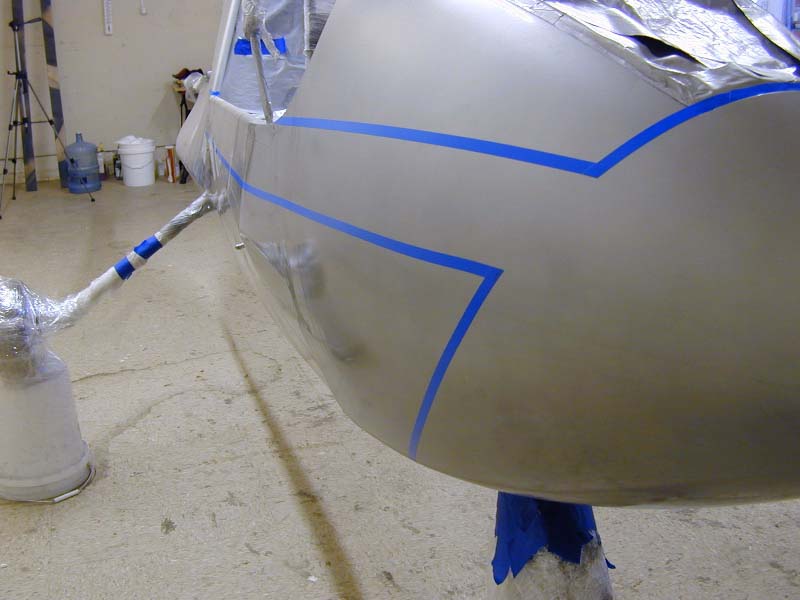 |
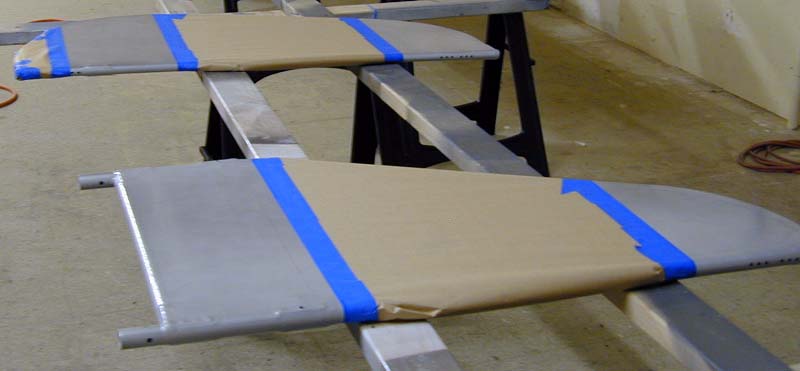
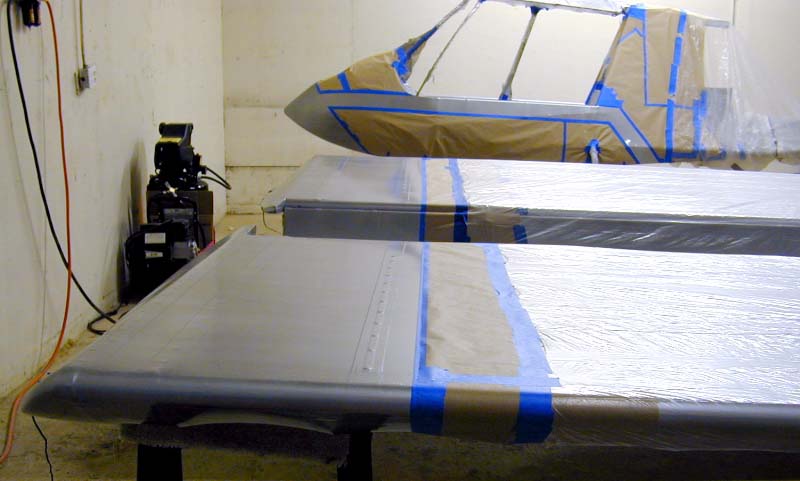
If you have a striping design in mind for your Challenger, you will have to tape off that design, then apply painters brown paper to mask off areas you don't want to paint. The 3/8" blue edge tape is a Vinyl 3M, usually available from auto parts stores or auto painting suppliers and costs about $10.00 per roll. Although the cost of the finishing tape is rather expensive, it "IS" a necessity for a good paint edge line when removed. IMPORTANT: Do not confuse the 3M Vinyl edge tape with hardware store painters tape. |
 |
 |
 |
 |
Using the final color for your striping, follow the painting proceedure at the beginning of the "Final Color Painting", above. |
 |
 |
 |
After you have removed all of the masking tape and paper, and assembled your Challenger, this is what the final stage should look like. Of course, striping designes and color will vary depending on one's individual taste. |
 |