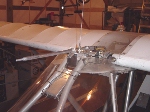
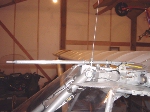
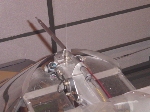
The following information & photos are examples of ways to install or modify the Pitot Tube Assembly, but are not meant to be the only way to install the pitot tube.
Other static pitot tubes vailable at Aircraft Spruce: Static Pitot Tubes
Pitot Tube installation instructions submitted by:
Mr. Jim Hayward
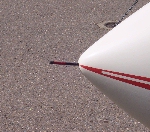
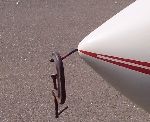
We feel it important to include information pertaining to the availability of a "REMOVABLE" Pitot Tube. There have been many complaints of the pitot tube being broken off by kids at air shows, or young adults blowing into the pitot tube and another watching your ASI to see how good the other kid did. Well, after you land and get parked, just unscrew the pitot tube and put it away till you leave. Available at Aircraft Spruce: Pitot Pal - Deluxe Kit |
 |
PITOT PAL INSTALLATION
Step #1) Please take a moment and inventory the following items:
- Pitot Pal adapter.
- 1/2-13 black nylon nut.
- 1/4" diameter aluminum Pitot tube.
- 6ft. of 1/4" I.D. plastic tubing (deluxe kit only).
- Airspeed Indicator tubing adapter (deluxe kit only).
Step#2) Drill a 1/2" diameter hole in the desired mounting location
Step#3) Insert Pitot Pal adapter through hole and secure with 1/2-13 nut. On some occasions a washer will need to be added if the mounting location is thinner than the non-threaded portion of the adapter. Hint: A little silicone will make for a watertight fit and will also help the nut from working loose.
Step#4) Install plastic tubing from Pitot Pal adapter to the air speed indicator.
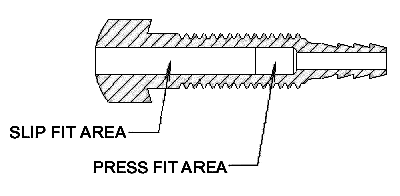
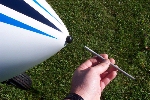
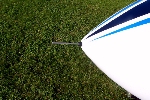
Step#5) The aluminum Pitot tube may need to be sanded slightly to achieve the fit you desire. The idea is to sand the aluminum tube until it will slide into the Pitot Pal adapter approximately 1 7/16" and then press into a slightly smaller fit inside the adapter. This will lock the Pitot Tube in place and if you wish to remove it a slight twist will release it. See diagram below. Your Pitot Pal is now installed. Make sure that if you remove the Pitot Tube for any reason, that you replace it before flight. Pitot Pal installation instructions submitted by: This is a very easy way to provide a flexible pitot tube set up. It consists of a 6" piece of wire wrapped cable housing, a length of flexible tubing, rubber or gas line will work just fine, that slips over the end of the cable housing. Just drill a hole thru the nose cone point, insert the cable housing and slip the flexible tubing over it and slip the other end of the flex tube over the fitting on the airspeed indicator. Some, like myself, will want to provide some extra thickness at the inside of the cone point area for more support. If the the inside of the cone point is filled with copped fiberglass and resin prior to drilling, the the pitot is removable. If on the other hand the extra fiberglass support is added after the cable housing has been inserted it will not be removable. Both ways work fine. Pitot Tube installation instructions submitted by:
Mr. Mike Watson
Maker of Pitot Pal
Mr. Ralph Shultz
