Covering The Wings
AFS System
The following is an AFS, CecoBond Cement covering job of the wings. We will also present a Poly Fiber system wing covering job in another web page. Please remember, there are usually several ways to complete any job, the following information is just one of these examples.
We have added photos from another build showing a couple of missing areas in the beginning of this stage of covering. However, the covering process photos will be exclusively from our builder using the AFS gluing system.
NOTE: Aircraft Finishing Systems (AFS) is no longer in business. However, the production rights to the former AFS of Montana has been assumed by Stewart Systems of Washington.
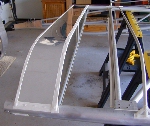 |
Be sure to apply three (3) layers of the Dacron tape over all rivets and sharp edges, like the gussets and aluminum sheeting edges. |
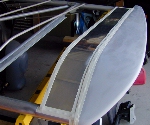 |
Before applying the glue edge tape, be sure to completely clean all aluminum parts to be glued with MEK. See MEK Warning Information before using. |
After the masking tape has been applied, you will need to apply only a single coat of CecoBond glue from the glue line and extend around the spar to about the middle of the inside of the spar. Use a small paint brush to apply your glue. |
 |
You can either tape the fabric into place or use something to weight the fabric along the edge to hold the fabric flat and without major wrinkles for gluing. |
 |
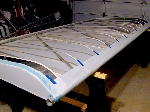 |
You will now need to turn the wing over, top up, and trim off any access fabric from the edge of your glue area before finishing the edge gluing process. |
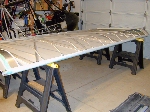 |
After you have covered the bottom, you will need to open any bolt or rivet holes in the fabric on the spars which are under the applied fabric. If you do not do this before covering the top of the wing, the holes will be very difficult to locate under two layers of fabric. Using an inexpensive pencil soldering iron, burn or melt the fabric to open the holes "now" before continuing. |
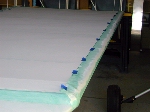
When applying the glue edge masking tape, start at about 1/8" after where the covering fabric starts to wrap around the wing spar at the top and end about 1/8" prior to there the bottom fabric leaves the spar. This will give you about a 2" glue surface to work with for gluing the top fabric to the spars. Wait until the first coat of glue has fully set up before applying the second coat. Prior to applying your glue to the spars, first apply about a 1/4 inch coat of CecoBond glue to the top portion of the ribs from one end to the other. You will need to reactivate this glue "after" ironing the fabric to full tightness and before applying the reinforcing tape on the fabric above the ribs. This will take place in the next article, called "Securing & Riveting The Wing Ribs". Use a small paint brush to apply your glue. Again, you will need to apply a single coat of the glue between the two masking tape glue lines. Let the cement tack up for about 5 minutes then apply the fabric to that cemented area. Now, remove the masking tape by folding the tape back onto itself and slowly pull the tape off. |
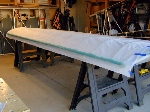 |
The top fabric is attached much like the bottom, except in the area of glue applied to the spars. (See Next) |
 |
Now, turn the wing over and iron the bottom at 350F degrees and you are done with the wing covering process. |
In the next section, we will go over attaching the top fabric to the wing ribs with reinforcing tape, rivets and finish tape. |